
Ever stepped out of bed onto a freezing floor? Brutal, right? That’s exactly why more homeowners are turning to infrared underfloor heating. The kind of warmth that greets you from the ground up, evenly and silently.
And it’s not just about comfort. With rising energy bills and a push for greener homes, people want heating systems that are smarter, cheaper to run, and better for their health. Infrared ticks all the boxes, but most folks still have no idea how it actually works or what it costs to install.
Let’s clear all that up. This guide will walk you through everything, from how it works to installation tips, costs, and whether it’s the right move for your home.
What Is Infrared Underfloor Heating?
Okay, picture this. Instead of blasting warm air into a room like traditional heaters do, infrared underfloor heating warms up everything it touches; your floors, your furniture, your body. It’s like the cozy feeling of sunshine pouring through a window, but under your feet.
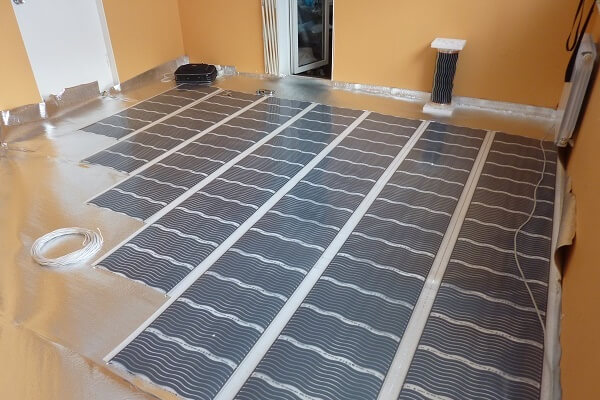
Here’s how it works. Infrared systems use ultra-thin heating mats or carbon film tucked just beneath your flooring. When they’re powered on, they emit radiant heat – the kind of warmth that heats objects directly, not just the air.
According to the UK Department for Energy Security and Net Zero, Infrared radiant systems like these can use 2–15% less energy than conventional underfloor systems depending on how they’re controlled, thanks to lower heat loss into building structures.
This kind of system is especially great for well-insulated homes or for people who want targeted, energy‑efficient heat that doesn’t waste energy warming up empty space.
Types of Infrared Underfloor Heating Systems
Not all infrared underfloor heating is built the same, and choosing the right type depends a lot on your space, flooring, and how hands-on you want to be with the install.
Let’s break down the main types:
1. Carbon Heating Film
This is the most common and flexible option, especially for DIYers. It’s super thin, lightweight, and can be rolled out directly under floors like laminate, wood, or even carpet (with a little extra prep). Because it’s so thin, it doesn’t raise your floor height much, which is a big win during renovations.
2. Infrared Heating Mats
These are similar to the film but come pre-spaced on a mesh backing. That makes installation easier for larger rooms where you want even spacing without measuring everything yourself. Great for tiles or bigger open-plan areas.
3. Infrared Heating Panels
These aren’t floor-based, they go on your ceiling or walls. While not “underfloor,” they use the same radiant technology and can work alongside floor heating or on their own. They’re popular in offices or minimalist spaces where you don’t want to touch the flooring at all.
Each type has its pros and quirks, but they all deliver that same consistent, radiant warmth without the clunky pipes or fans.
Benefits of Infrared Floor Heating
Let’s be real, most of us just want to feel warm without fighting over the thermostat. But infrared underfloor heating brings more than just comfort. Here’s why folks swear by it.
Comfort that Actually Makes Sense
Infrared heat warms up the things that matter and not just the air, which are, you, your furniture, and your floors. So there’s no random cold spots or hot pockets. It feels like a soft, even warmth that sticks around instead of disappearing the second the system turns off.
Energy Savings You’ll Notice
Traditional systems waste a lot of energy heating the air, especially if you’ve got high ceilings. But, radiant floor heating in general can be 20–30% more efficient because it skips energy losses from ductwork and warms objects directly.
In some trials, users report 30–50% lower heating bills after switching to infrared panels in well‑insulated homes with zoned control.
Cleaner, Healthier Air
No blowing dust. No circulating allergens. No dry air messing with your skin or sinuses. Since there’s no forced air movement, your home stays cleaner and your lungs will thank you, especially if you’ve got allergies or asthma.
Design Freedom
Because the system is hidden under the floor, your walls are completely free for art, furniture, or just clean minimal vibes. No bulky heaters or radiators getting in the way.
Infrared vs Traditional Underfloor Heating
There’s more than one way to heat your floors, but not all systems are created equal. If you’re wondering how infrared compares to the old-school methods like hydronic (water-based) or electric cable heating, here’s what you need to know.
Infrared vs Hydronic Systems
Hydronic systems run warm water through pipes beneath the floor. They’re often used in new builds and can be cost-effective long-term but the installation is a project. We’re talking floor excavation, plumbing, and a hefty upfront bill.
Infrared, on the other hand, is slim, electric, and much easier to install, especially in existing homes. No need to rip up your subfloor or wait weeks for a plumber. Plus, it heats up faster and doesn’t rely on a boiler or pump, which means less maintenance and fewer things that can go wrong.
Infrared vs Electric Cable Heating
Electric cable systems are another common option. They use thick wires laid under the floor to produce heat. While they’re relatively easy to install, they tend to use more energy and take longer to warm up than infrared film.
Infrared is more efficient because it directly heats the room and objects, not just the air around it. It’s also safer in many cases, running at lower surface temperatures while still delivering the same warmth.
Bottom Line
If you’re after something modern, energy-efficient, and simple to install, infrared usually comes out ahead. It’s not just a cheaper alternative, it’s a smarter one for most homes.
Installation Guide
Don’t worry, installing infrared underfloor heating isn’t some contractor-only, heavy-duty nightmare. It’s one of the easier systems to work with, especially if you’re into DIY or renovating a room.
Planning Comes First
Before anything goes down, you need to check a few things. Is your subfloor level dry? What type of flooring will go on top; tile, laminate, vinyl? Each surface has its quirks when paired with infrared heating.
Insulation is also key. Without it, your heat might sneak downwards instead of up into your room. Adding a proper underlay or reflective barrier helps keep the warmth exactly where you want it.
And yeah, you’ll need access to a power source. These systems run on electricity, so make sure your wiring and breakers can handle the load, especially if you’re covering a large area.

The Step-by-Step Process
Here’s how it usually goes:
- Clean and prep the subfloor so it’s smooth and ready.
- Roll out the carbon film or heating mats. These should fit neatly in the heated areas but avoid going under fixed furniture.
- Place a thermostat sensor in a good spot, typically centered and close to the surface, so it reads the temperature accurately.
- Connect everything to the thermostat. This is where you might want an electrician to double-check your work if you’re not confident.
- Once it’s all tested, lay your flooring over it, and you’re good to go.
DIY or Call a Pro?
If you’re handy and working in a single room, you can probably handle most of the install yourself. But for whole-home setups or when messing with electrical connections, it’s always safer to bring in a pro – even just to wire the thermostat correctly.
Cost Breakdown
Infrared underfloor heating isn’t just for luxury homes anymore. It’s become way more affordable, especially compared to hydronic setups or whole-house radiator systems. Still, the total cost can vary a lot depending on your space, flooring, and how much of the work you plan to do yourself.
Material Costs
The biggest chunk of your spend will go toward the heating mats or film, plus a thermostat. On average, you’re looking at:
- Around £10–£20 per square meter for the heating film
- £40–£100 for a good thermostat (Wi-Fi enabled ones are on the higher end)
- Additional bits like insulation boards, tapes, and connectors
If you’re doing a single room, say a 10m² kitchen, your materials could fall anywhere between £150 and £300 total.
Installation Costs
Doing it yourself? You’ll save a big chunk here. But if you hire a professional, expect to pay roughly £300–£600 depending on the size of the area and how complex the install is.
Some electricians charge a flat rate, others charge by the hour. It’s worth getting a few quotes before locking anyone in.
Running Costs
Here’s the part that really makes people smile. Infrared systems are super efficient. If your home is well insulated, you could be looking at running costs as low as 4–7p per square meter per hour and less if you’re using solar or have off-peak tariffs.
Over time, those savings can really stack up. Especially compared to electric radiators or convection heaters, which eat way more energy to do the same job.
Best Floors for Infrared Heating
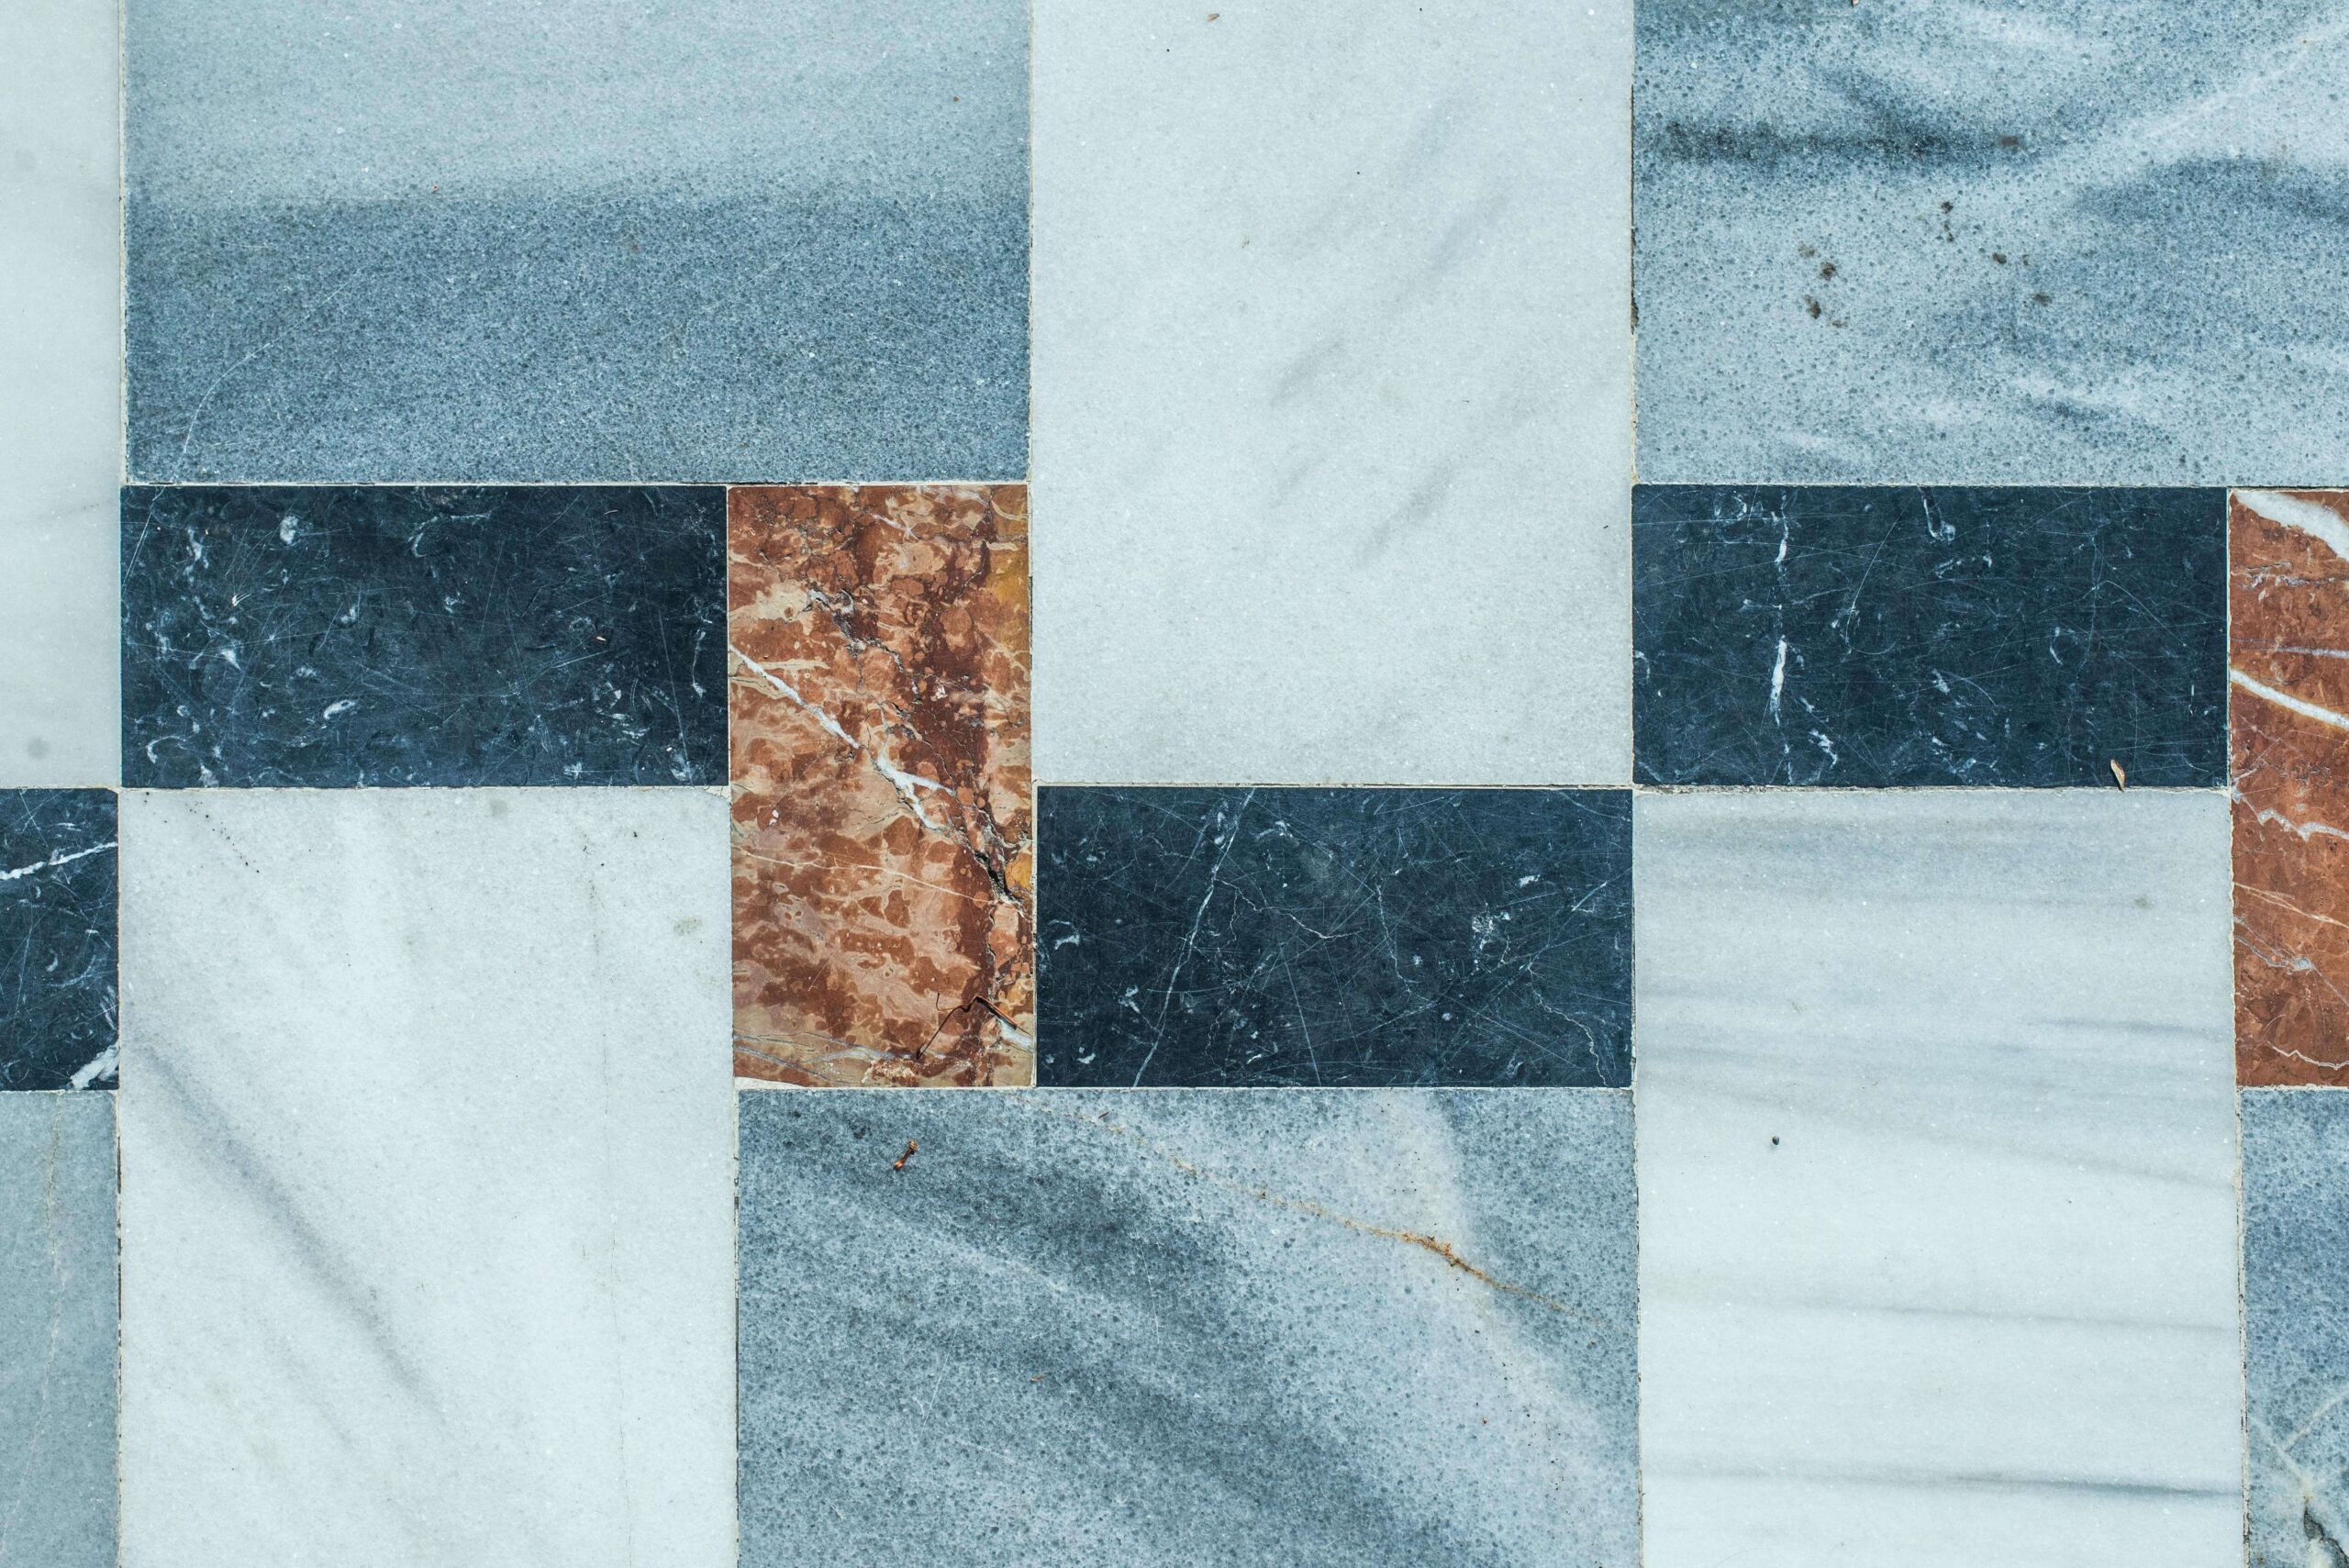
Not every floor is besties with infrared heat. Some materials transfer and hold heat better than others. So if you want that warm, toasty feel without damaging your floor (or wasting energy), here’s what works best.
Tile and Stone
These are your top-tier options. Tile and stone conduct heat super efficiently and retain it for longer, meaning the room stays warm even after the system shuts off. Perfect for kitchens, bathrooms, or anywhere you want a strong, steady heat.
Laminate and Engineered Wood
These are also solid choices, but there’s a catch. You’ll need to make sure the flooring is rated for use with underfloor heating. Too much heat can cause warping if the material isn’t built for it. Stick to engineered options over solid wood, they’re more stable and less likely to shift.
Vinyl and LVT (Luxury Vinyl Tile)
Yep, these can work too, as long as they’re compatible with underfloor systems. Just double-check the max temperature rating from the manufacturer. Most are fine up to around 27°C. Go over that and you risk softening the adhesive or damaging the surface.
Carpet
This one’s a bit tricky. You can use infrared under carpet, but only if the carpet and underlay have a low combined tog value (under 2.5 ideally). The thicker the material, the more it blocks heat. So while it can work, it’s not the most efficient setup.
Pro Tip: Always check the flooring specs before you install. Most manufacturers will clearly state whether it’s compatible with underfloor heating and some even void warranties if it’s used incorrectly.
Maintenance and Troubleshooting
Here’s some good news: infrared underfloor heating is one of the lowest-maintenance heating systems you can get. No filters to clean, no pumps to service, no radiators to bleed. But like anything electric, a little attention now and then keeps things running smooth.
Routine Checks
Once or twice a year, just do a quick check on your thermostat. Make sure it’s reading temperatures accurately and not acting weird. Some systems also come with built-in diagnostics or app controls that alert you if something’s off.
It’s also a good idea to glance over any exposed wiring or junction boxes, especially if they’re in a loft or utility room. Nothing fancy, just basic “is everything still plugged in and clean” stuff.
Common Issues and Quick Fixes
Here are a few hiccups you might run into:
- Cold Spots on the Floor
Could be an air gap or poor insulation underneath. If it’s a large area, it might be worth having a pro take a look. - Thermostat Not Responding
First, check the power supply and breaker. If it’s still dead, the issue could be with the sensor or a loose wire behind the wall. - Uneven Heating
Sometimes this happens if mats or film were overlapped during installation, or if certain areas are being blocked by large furniture.
Most problems are rare if the system was installed properly. And since there are no moving parts, breakdowns are few and far between. If you ever do need a repair, it’s usually just a matter of lifting the flooring above the issue, not digging up the entire system.
Final Thoughts and Tips
If you’ve been sitting on the fence about upgrading your heating system, infrared underfloor heating might just be the thing that makes your home feel next-level; not just warmer, but healthier, quieter, and way more efficient.
It’s not hype. The tech is solid, the install is easier than most people think, and the comfort is real. Whether you’re renovating a single room or planning a full-home refresh, infrared gives you that “step out of bed and still feel cozy” energy without spiking your energy bills.
If you’re serious about it, start small. Try one room. See how it feels. Once you’ve lived with it, there’s a good chance you’ll want to rip out every radiator and never look back.
FAQ – Everything You Want to Know
Is infrared underfloor heating safe?
Yes, totally. It emits gentle, far-infrared waves. The same kind our bodies naturally absorb from the sun and operate at safe surface temperatures. Plus, there’s no exposed heating element once installed.
How fast does it heat up?
Pretty quickly. Most systems start warming the floor in 5 to 10 minutes, and the room can feel cozy in under 30, depending on your insulation and floor type. Way faster than water-based systems.
Can I install it myself?
If you’re comfortable laying flooring and doing light electrical work, yes. Just make sure a certified electrician connects the thermostat and checks the wiring. If you’re not DIY-savvy, it’s best to hire someone to avoid future issues.
Can it heat a whole house?
Absolutely, as long as your home is well-insulated. Many people use infrared as their primary heat source, especially in new builds or renovated spaces where energy efficiency is a priority.
What happens if something goes wrong under the floor?
Good systems rarely fail, but if they do, most manufacturers offer warranties of 10–20 years. Repairs usually involve lifting just the section of flooring over the fault, not the entire room.
Will it work with solar panels?
Yes! In fact, pairing infrared heating with solar makes it even more energy-efficient. You’ll basically be heating your home for free once your panels are paid off.